
Set the Correct Document Size
-
Match the final finished size exactly
-
Brochure: A4 / A5 / custom size
-
Packaging: use the official dieline
-
-
Orientation (portrait / landscape) must be correct
-
Do not scale designs at print time


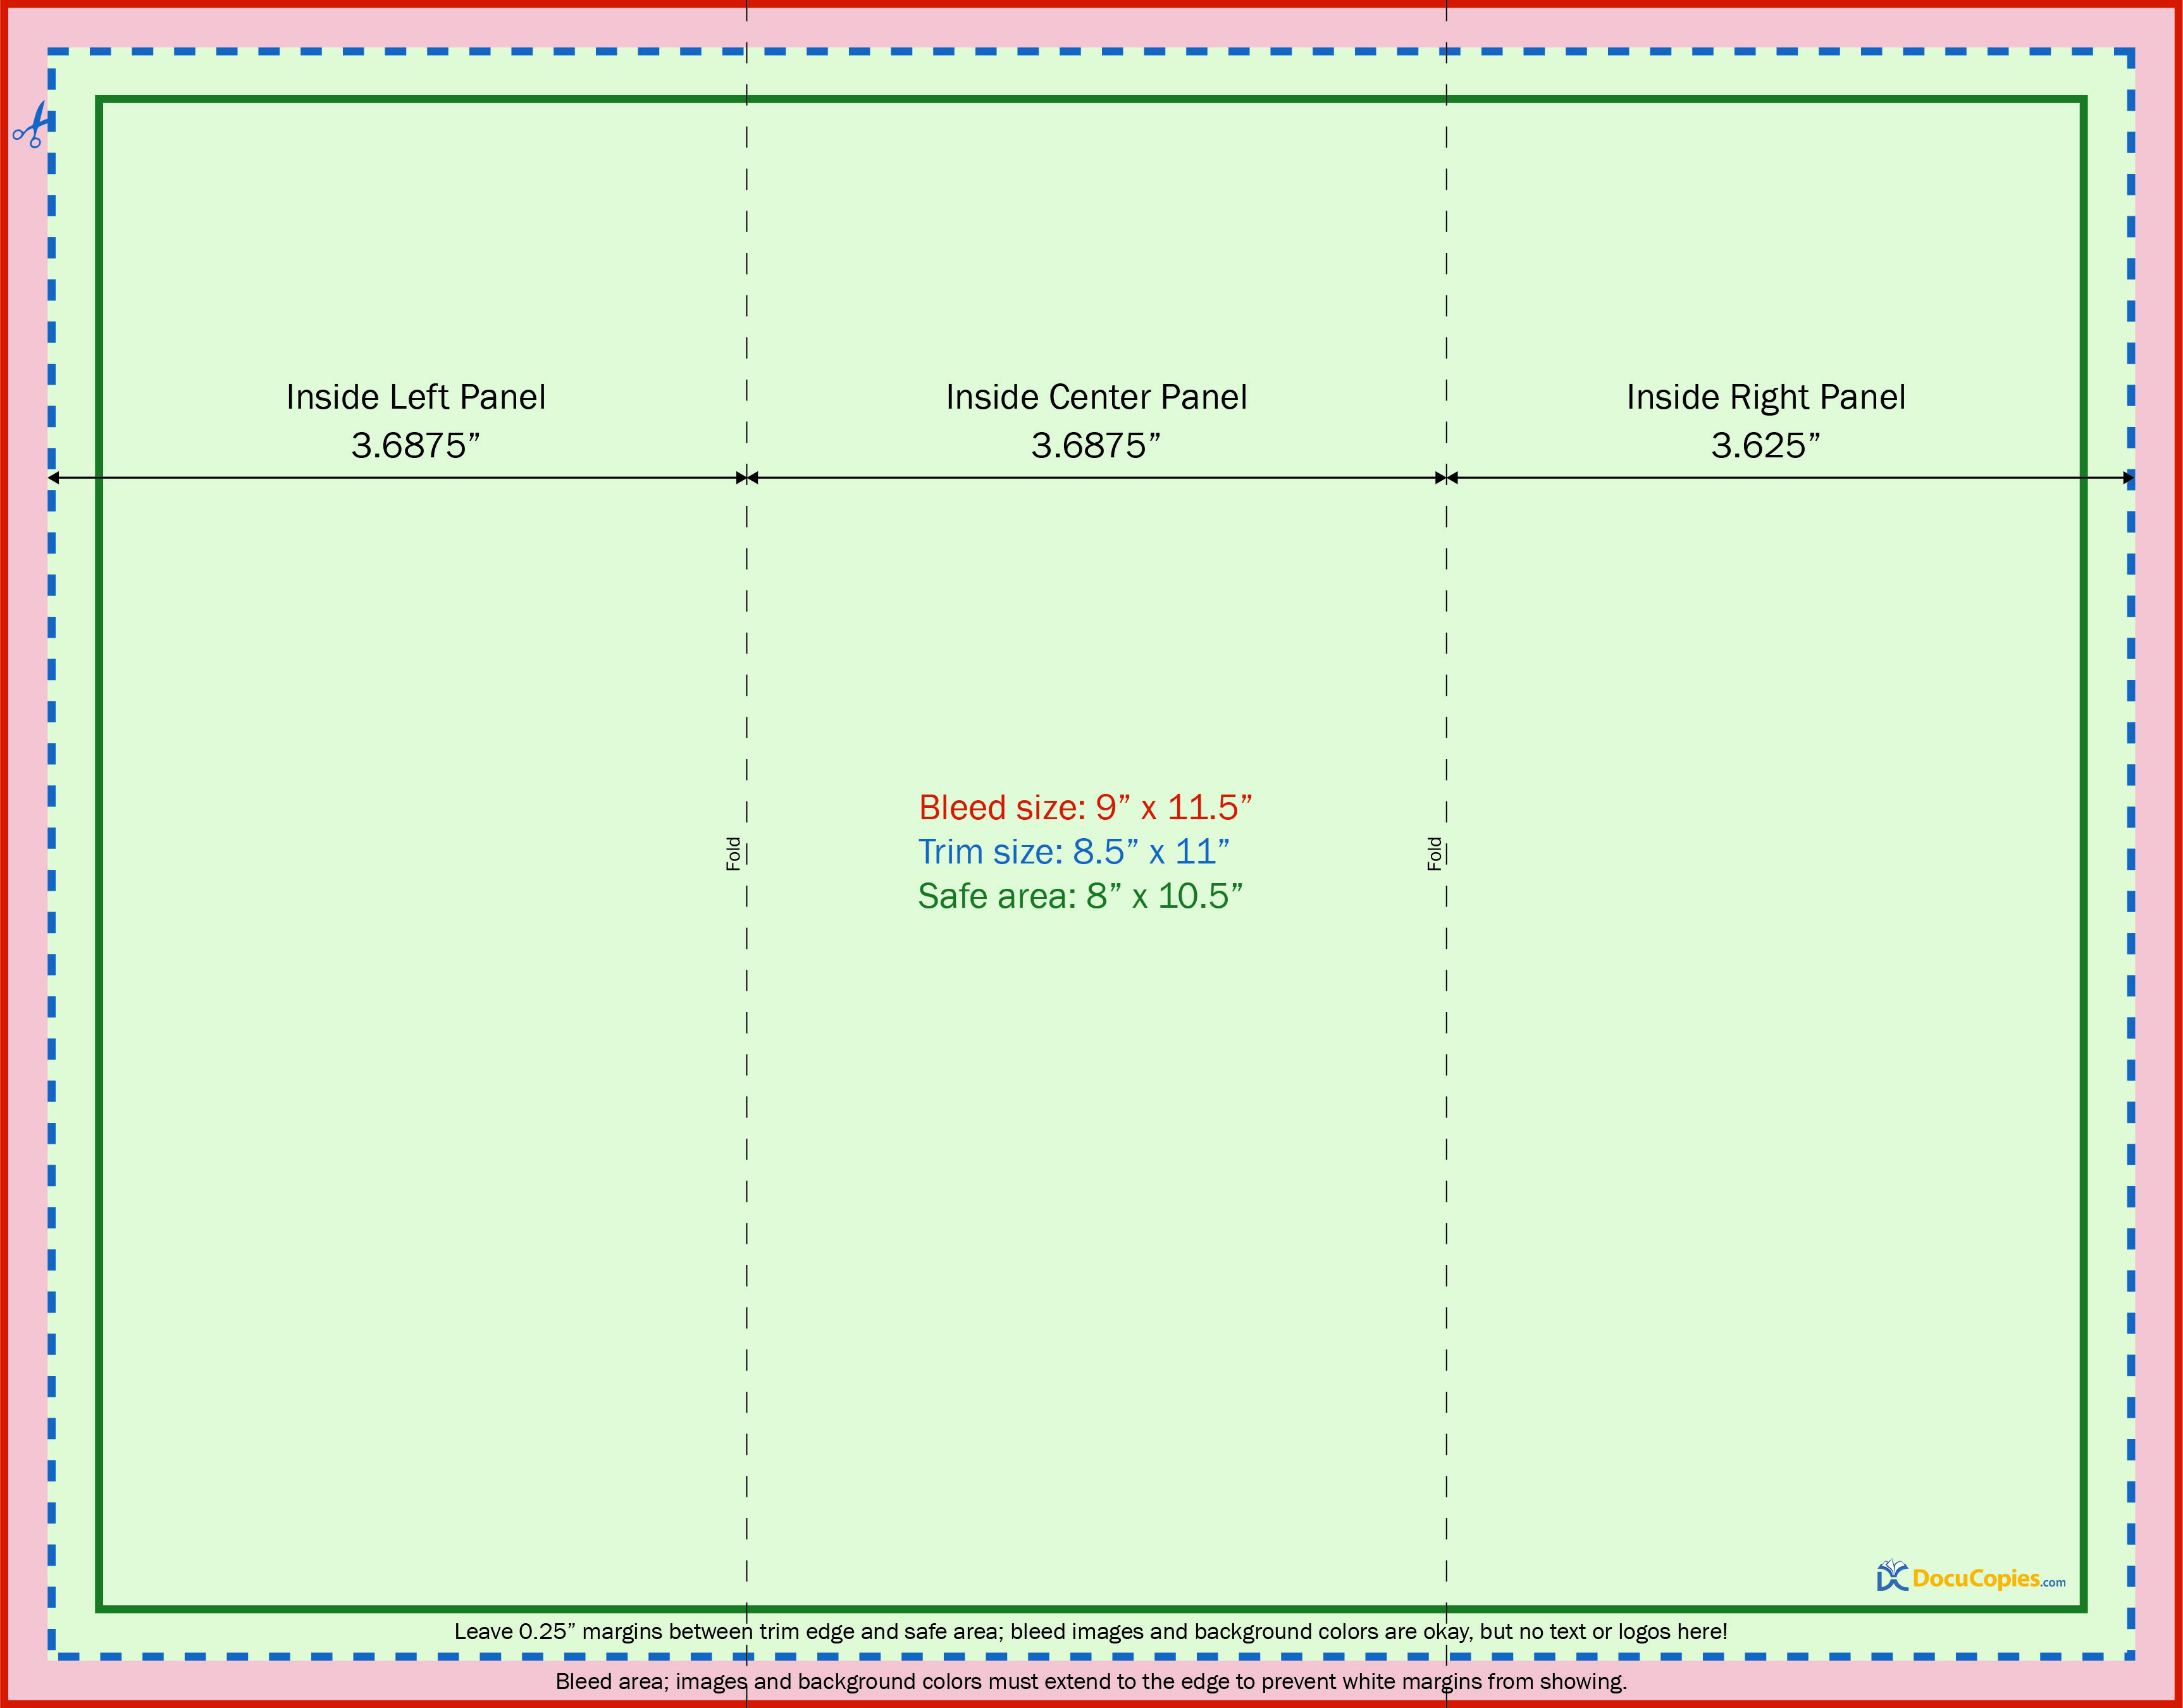
2️⃣ Add Bleed, Trim & Safe Margins
-
Bleed: 3–5 mm on all sides
-
Trim line: where cutting happens
-
Safe area: keep text/logos at least 5–7 mm inside
-
Backgrounds & images must extend into the bleed
📌 Most cutting issues come from missing bleed.
3️⃣ Use the Correct Color Mode (CMYK)
-
Always design in CMYK
-
Avoid RGB (screen colors ≠ print colors)
-
Recommended profile:
-
FOGRA39orISO Coated v2
-
-
Black text:
-
Small text → 100% K
-
Large black areas → Rich black (C40 M30 Y30 K100)
-
4️⃣ Image Resolution Rules
-
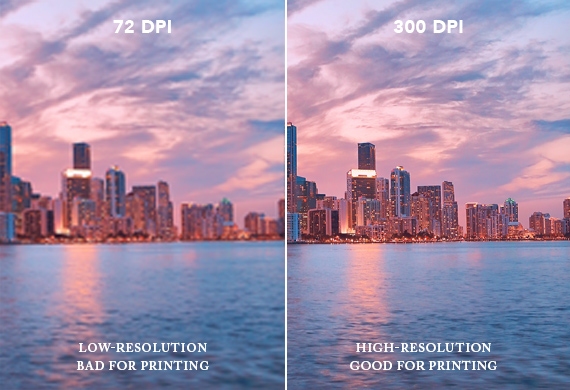
300 DPI at final size (minimum 240 DPI)
-
Avoid screenshots or WhatsApp images
-
Don’t stretch small images to large sizes
-
Preferred formats:
-
TIFF / PSD / High-quality JPG
-
5️⃣ Fonts: Don’t Let Them Break
Choose ONE:
-
✅ Convert all fonts to outlines
-
✅ Or embed all fonts in the PDF
❌ Never leave system fonts unembedded
❌ Avoid very thin fonts (<6 pt)
6️⃣ Packaging-Specific Rules (Very Important)
-
Use the exact dieline (do not redraw it)
-
Keep dieline on a separate non-printing layer
-
Do NOT place text on:
-
Fold lines
-
Glue areas
-
Lock tabs
-
-
Indicate:
-
Inside vs outside print
-
Lamination / foil / spot UV layers (if any)
-


7️⃣ Finishing Layers (If Used)
Create separate vector layers for:
-
Spot UV
-
Foil stamping
-
Emboss / deboss
-
Die-cut paths
Rules:
-
100% solid color
-
Named clearly (e.g.
SPOT_UV,FOIL_GOLD) -
Overprint enabled
8️⃣ Export Settings (Final Output)
✅ PDF/X-1a or PDF/X-4
✅ High quality / Press quality
✅ Bleed included
❌ No crop marks unless printer requests them
9️⃣ Final Pre-Print Checklist ✅
Before sending:
-
Size matches product
-
CMYK colors
-
Bleed added
-
Fonts outlined/embedded
-
Images 300 DPI
-
Dieline correct (for packaging)
-
No spelling mistakes
10️⃣ Pro Tip from the Print Floor 🧠
If you’re unsure about dieline, material, or finishing →
Ask the printer BEFORE designing, not after.